
Introduction to Door Installation in Milwaukee
Getting a new door installed in your Milwaukee home can really change how your place looks and feels. It’s a straightforward way to give your home a fresh, new look. But, before you dive in, you need to know what you’re getting into. This isn’t just about picking a door and slapping it into the frame. There’s a bit more to it. You’ve got to think about the type of door that suits your home, the materials that will last and fit your style, and, importantly, who’s going to do the heavy lifting. In Milwaukee, the weather can be a big player in your choice. You want a door that stands up to those cold winters and breezy summers. Plus, local regulations might have something to say about your project, so keeping those in mind is smart. Whether you’re a DIY enthusiast ready to tackle this yourself or looking to call in the pros, understanding the door installation process will make things smoother. Let’s dive into what makes door installation in Milwaukee a unique project to tackle.
Preparing for Your Door Installation: What You Need to Know
Getting ready for a door installation in Milwaukee isn’t hard, but you’ve got to know what’s up. First, clear the area. Move all that stuff around the door; we’re talking furniture, decorations, rugs. Just push it all to the side. Next, take a measurement of your doorway. Write down those numbers – width and height, so you don’t forget. You’re also going to want to check the door frame. Make sure it’s solid and there’s no damage. If it looks sketchy, get it fixed first. This step is crucial; you want your new door to fit nice and snug. Once your space is ready, and you’ve got your measurements down, the real fun starts. Just remember, a bit of prep goes a long way in making sure your door installation goes smoothly.
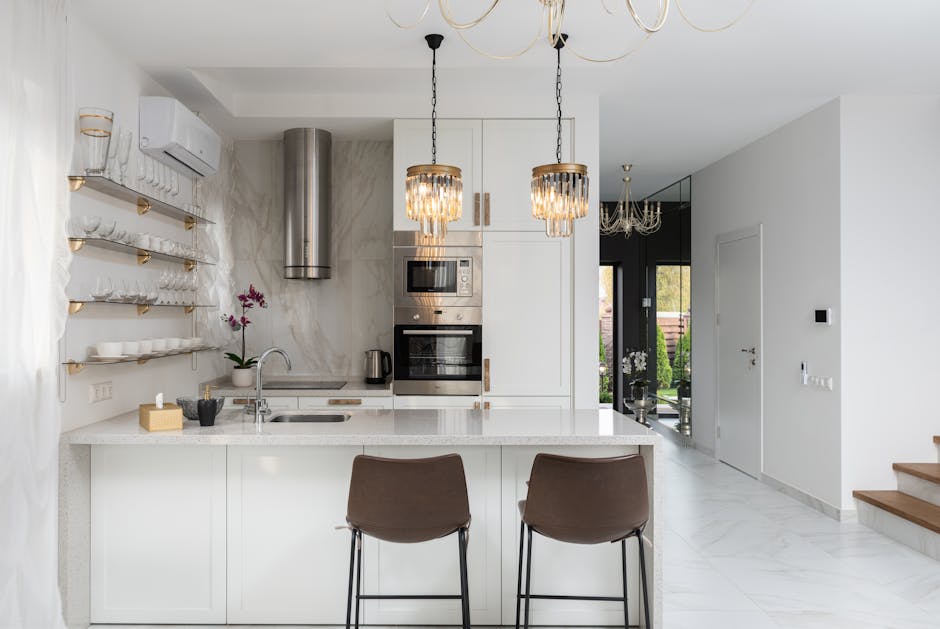
Choosing the Right Door for Your Milwaukee Home
When picking a door for your Milwaukee home, think simple but effective. This is about the door’s material, style, and how it fits with your home’s overall vibe. First up, material matters. Wood offers a classic look but needs more care to keep it looking fresh. Steel, on the other hand, stands up to Milwaukee’s weather better but can dent. Fiberglass splits the difference, offering durability and a wood-like appearance, minus the upkeep.
Next, consider style. You want a door that says “welcome” but also “I belong here.” Is your home modern or traditional? Your door should reflect this. And don’t forget about color. A pop of color on a front door can make your house stand out, but make sure it complements your home’s color scheme.
Lastly, think about the door’s purpose. A solid door offers more security and insulation, while a door with glass panels can brighten up your home’s entryway but might sacrifice some privacy and energy efficiency. It boils down to what matters most to you: looks, durability, or a bit of both. Pick wisely, and that door will serve you well, through Milwaukee’s snowy winters and sunny summers.
Tools and Materials Needed for Door Installation
To start your door installation in Milwaukee, you’ll need the right tools and materials. First off, grab a measuring tape to get accurate dimensions of your doorway. You’ll definitely need a level to make sure your door isn’t hanging wonky. A drill is non-negotiable for securing the doorframe, and you’ll want both a screwdriver and hammer handy for various tasks. Don’t forget a saw – sometimes, the door or frame needs a trim. As for materials, the door itself is the star. But you’ll also need shims to ensure a snug fit, screws to fasten everything together, and possibly some wood filler to tidy up any imperfections. Insulation or weather stripping might come in handy to keep your home cozy. Lastly, paint or varnish will give your door the perfect finish. Make sure you’ve got these covered, and you’re set for a smooth installation.
Step 1: Measuring Your Door Frame Accurately
First off, you want to measure your door frame correctly. This step is critical. Get it wrong, and everything that follows is off. Here’s how you do it: grab a tape measure. Measure the height and width of your door frame inside the trim. Write these measurements down. You’ll need them to buy the right size door. It sounds simple, but it’s easy to mess up. Don’t forget to measure twice, just to be sure. If your house has settled a bit, which happens, your frame might not be perfectly square. If that’s the case, measure the width at the top, middle, and bottom. Use the smallest measurement to ensure the new door will fit. Same goes for the height – measure on both the left and right sides and use the smallest measurement. This step saves you from a headache later. Trust me.
Step 2: Removing the Old Door
Once you’ve got your tools ready, it’s time to remove the old door. Start by using your screwdriver to take off the hinges from the door frame. If your door is attached to the frame with pins, you might just need a hammer to tap them out. Remember to support the door as you remove the last hinge or pin, so it doesn’t fall. Next, if there’s any caulk or paint sealing the door frame, slice through it with a utility knife. This makes it easier to pull the frame away from the wall without causing damage. Once everything holding the door to the wall is gone, gently remove the door. If it’s heavy, make sure you’ve got someone to help you out. This step is crucial because a clean removal ensures a smooth installation for your new door.
Step 3: Prepping the Door Frame
Before you start slapping a new door into place, you need to prepare the frame. It’s a key step, and here’s how to nail it down. First, check the frame for any damage. If it’s warped or rotted, fix it or replace it. You can’t put a new door on a bad frame. Next, make sure the frame is level. Even the best door won’t close right if the frame’s slanted. Use a level and make any adjustments. Then, clean the area. Dust and debris will mess with your installation. Finally, measure the frame and the door. They need to match. If they don’t, you might have to trim the door or, sometimes, even get a new frame. That’s about it for frame prep. Simple but critical.
Step 4: Installing the New Door
Once the old door is out and the area is prepped, it’s time to get your new door in place. First things first, make sure the new door fits the opening. If it doesn’t, you might have to adjust the size of the opening or get a different door. Assuming the door is the right fit, here’s what you need to do next. Lift the door and set it into the opening. This part can be tricky and heavy, so having someone to help you is a good idea. Make sure the door is level by using shims. Shims are small pieces of wood or plastic that help adjust the door’s position until it’s perfectly level. Once the door is level and plumb, secure it in place by screwing through the door frame into the wall. You’ll want to start with the hinges. If your door came with pre-drilled holes, great. If not, you’ll have to drill them yourself. Make sure the screws are tight and the door swings open and closed smoothly. Lastly, install any door hardware like knobs, locks, or deadbolts. That’s it. Your new door is installed and ready to go. Just make sure to give it a test run, check for any gaps around the edges, and seal them if necessary to keep your home energy efficient.
Finishing Touches: Sealing and Painting
After hanging your door, it’s not over yet. Next up, sealing and painting – these steps ensure your door stands the test of time, looking sharp and keeping the elements out. First, let’s talk about sealing. A good sealant around the edges keeps moisture and drafts away, really important in Milwaukee’s weather. Go for a quality exterior sealant, apply it along the door frame, and let it dry. Don’t rush; patience pays off here.
Now, painting. Whether you’re going for a bold statement or a subtle vibe, the right paint can make a big difference. Use a primer first, it helps the paint stick and last longer. When choosing paint, pick one that’s meant for exterior use, to withstand sun, rain, and snow. A semi-gloss or gloss finish is a good choice; they’re easier to clean and resist wear better. Apply at least two coats, letting it dry thoroughly between each one. The effort you put into sealing and painting not only protects your door but also boosts your home’s curb appeal. Taking the time to do it right means you won’t have to worry about it for a while.
Post-Installation Maintenance Tips for Your New Door
After installing your new door, keeping it in top shape is key to making sure it serves you well for years to come. First off, regular cleaning is a must. Just use soap and water for most doors, but avoid harsh chemicals that can damage the material. Secondly, check the weather stripping annually to keep drafts out and your energy bills low. If it’s worn out, replace it. Third, oil the hinges if they start to squeak or seem stiff. A little lubricant goes a long way. Lastly, inspect the door frame and the door itself for signs of damage or warping over time. If you catch issues early, fixing them is usually simpler and cheaper. Taking these steps will help you get the most out of your new door.